A Restorative Foam Rolling Sequence for Self-Care
Self-care may sound indulgent, but the fact is that it’s never been more important than it is today. So much of our physical state is a result of the stress and tension we carry around on a day-to-day basis. When we’re stressed, we store up toxins and our energy (or chi, an Eastern concept that translates to life force) gets blocked. Obtaining true well-being involves working with the body as a whole, three-dimensionally, from top to bottom and from the inside out. The foam roller is good for so much more than aiding in physical therapy or working out knots and tightness. When used regularly and correctly, it can be utterly transformative and unbelievably healing. The roller is the best tool that allows you to independently remove the stored-up density and toxins in the tissues—and specifically the fascia—while simultaneously hydrating the tissue with oxygenated blood and fluid. The end result is healthy, malleable tissue.
Snow Angels
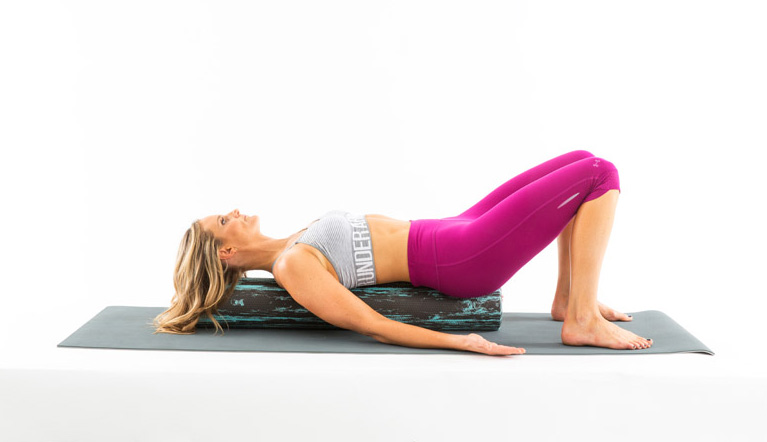
1 Lie on the roller with your spine supported from head to tailbone.
2 Begin with your arms extended down by your sides, with the palms of your hands facing up to open and expand the chest.
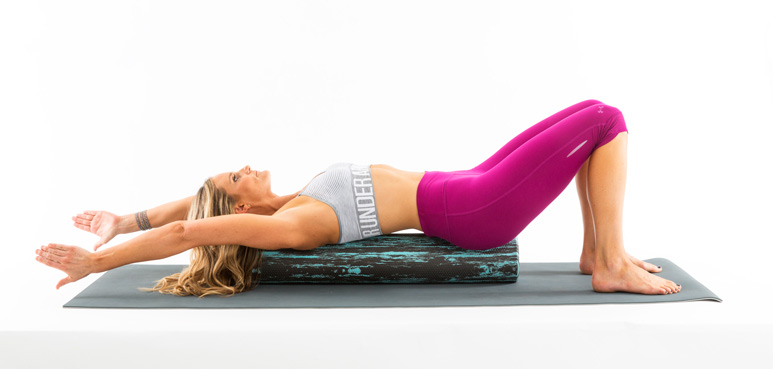
3 Inhale deeply as you reach your arms up overhead slowly and with control, keeping them as close to the mat as possible and parallel to the floor.
4 Exhale completely as you draw your arms back down to your sides.
5 Repeat eight times.
Slinky Spine
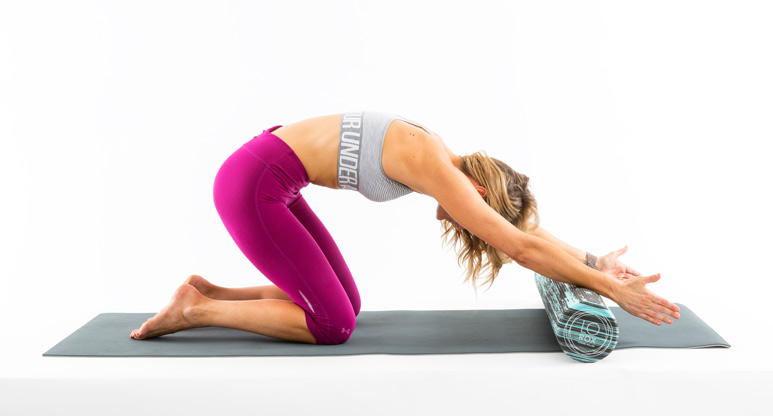
1 Inhale as you reach your arms up.
2 Exhale as you round your spine down to roll into a forward fold position that looks like an upside down letter U. Be sure to soften your knees to help gently open the lower back.
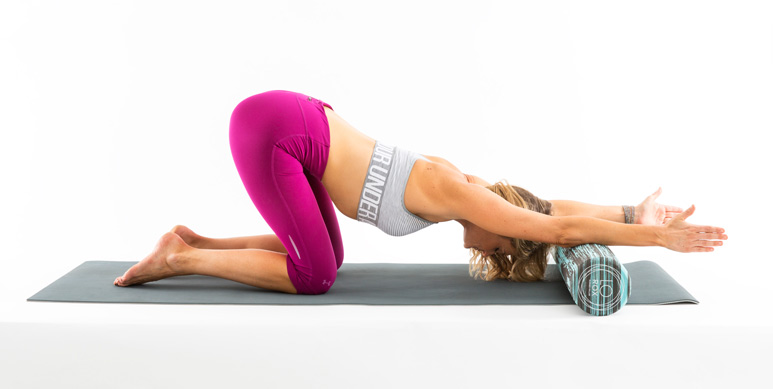
3 Inhale as you ground down through your feet, spread your toes, soften your knees, and use your core and strong legs to roll up, reaching your arms upward to stand.
4 Repeat four times.
Toe Tendon Joint Mobilization
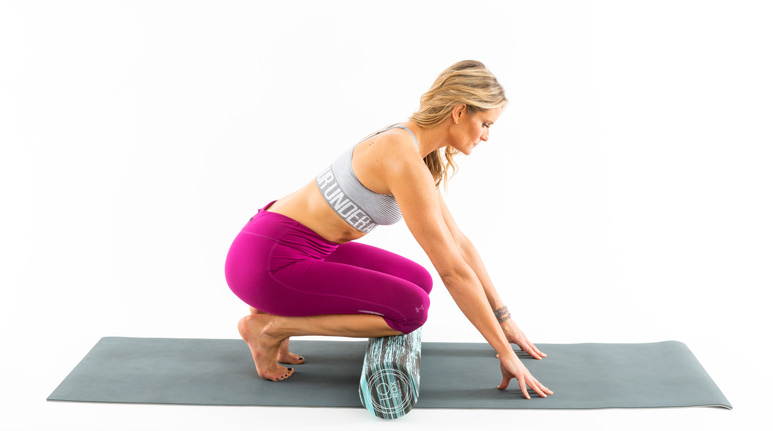
1 Come down to a deep squat position, checking to see how low your heels can go to the ground. Shift the roller under your mid-upper shins and keep your toes curled forward so your feet are really stretched out. Bend your elbows and place your hands shoulder-width apart on the mat. Keep your shoulders drawn down for the duration of the exercise.
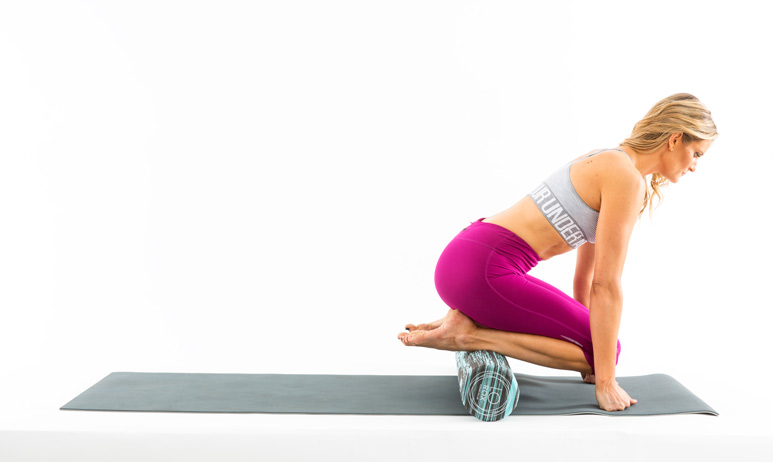
2 Use your feet to roll forward and back, stretching you feet and rolling your shins.
3 Repeat eight times.
Calf Roll with Ankles Crossed
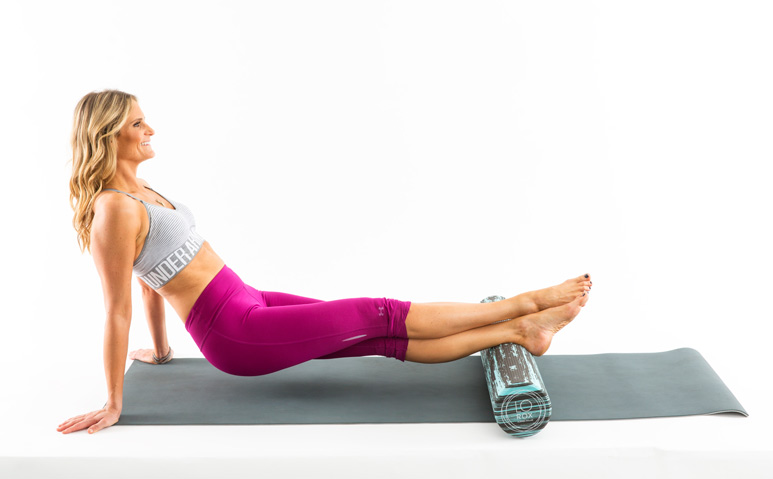
1 Sit on the mat with the roller placed under your calves, right below the knee (but take care to stay off the back of the knee).
2 Cross your left calf over your right calf on the roller.
3 Place your hands on the ground a few inches out on either side of your hips, fingers pointing outward.
4 Press down into your hands to lift your bottom off the mat, keeping your calves balanced on the roller.
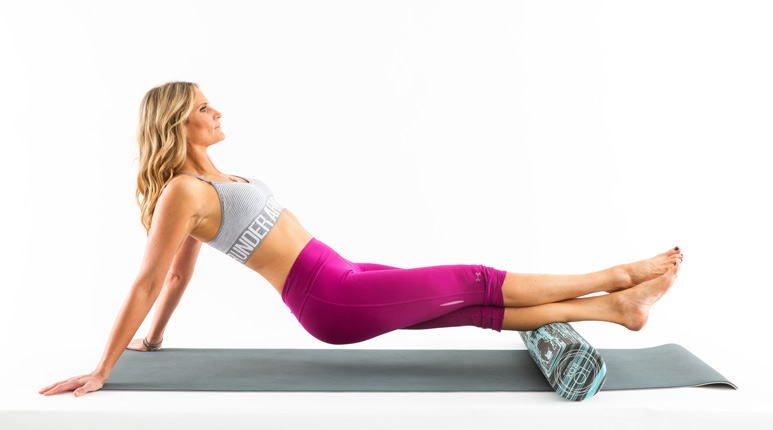
5 Continue pressing your hands down behind you and engage your core to drive your body weight forward and back, moving the roller slowly up and down the calf, from right below the knee to that area right above the ankle.
6 Repeat movement eight to ten times, then switch calves, put your left calf down on the roller and cross your right over top. Repeat movement eight to ten times on this side.
Back of thigh roll
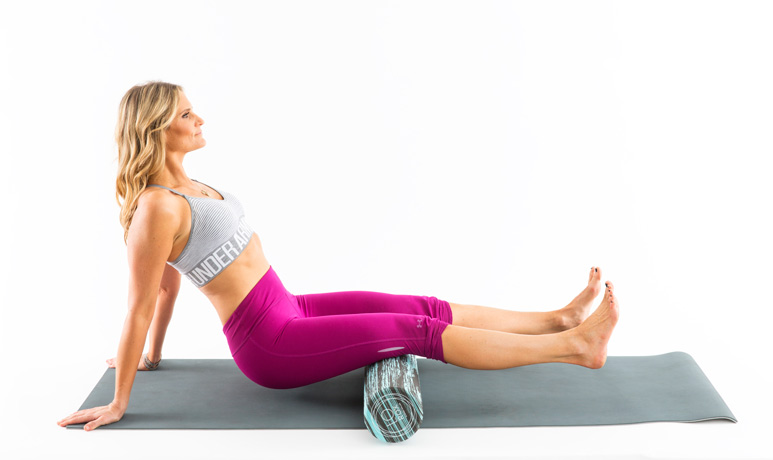
1 Sit on your mat with the roller under your hamstrings. Place your hands on the mat behind you, with fingertips pointing in toward your body.
2 Press your hands on to the mat to lift your bottom off the floor.
3 Continue pressing your hands on to the mat and engage your core to rock yourself forward, exhaling as you move the roller from the sitz bones to just above the knees.
4 Inhale as you draw the roller back, pushing it to your sitz bones.
5 Repeat eight to 10 times.
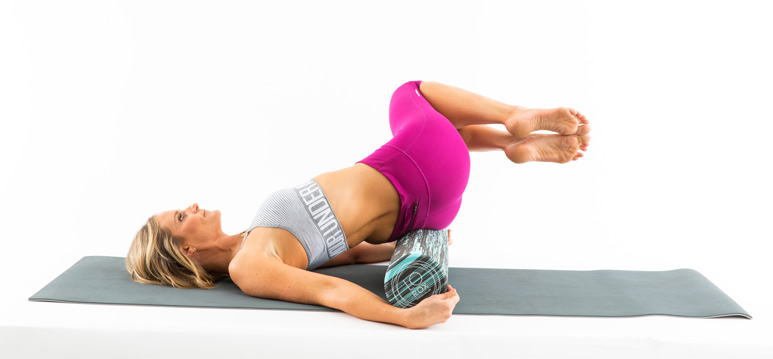
Inverted Tush Roll
1 Lay down on the mat with your knees bent and feet hip-width distance apart.
2 Lift your hips up off the mat and slide the roller under your hips/sacrum (the triangular bone at the base of your spine), just above the tailbone. Lift your knees up so they are hovering directly over your hips.
3 Inhale as your release your knees over to the right.
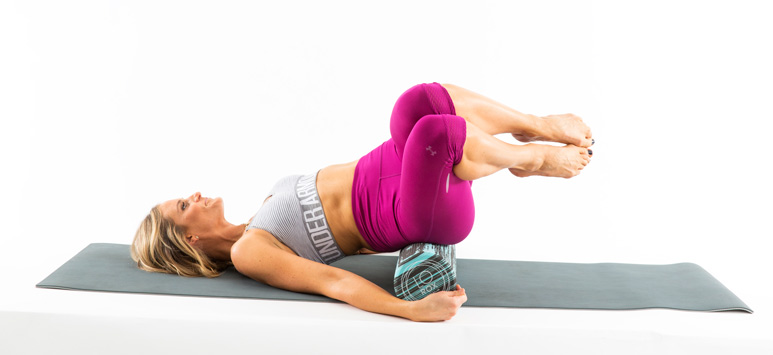
4 Exhale as you release your knees to the left.
5 Repeat eight times on each side.
Diaphragm Release
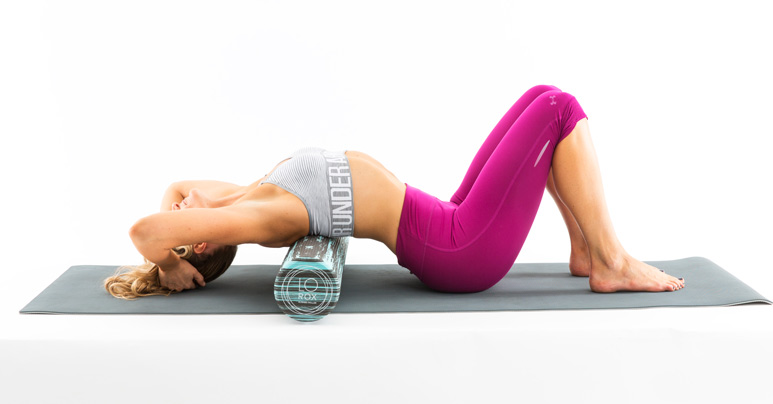
1 Place the roller underneath the bottom of your shoulder blades (at the bra line, for the ladies). Gently interlace your fingers and bring your hands behind your head to support your neck. Place your feet on the ground, parallel and hip-width distance apart.
2 Inhale as you arch your thoracic (or mid- to upper-back) over the roller.
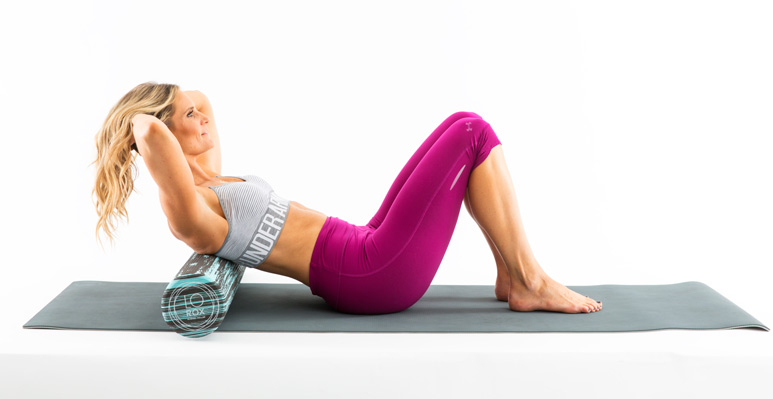
3 Exhale as you curl back up as if you were doing a crunch, squeezing all the air out of your stomach.
4 Repeat eight to ten times.
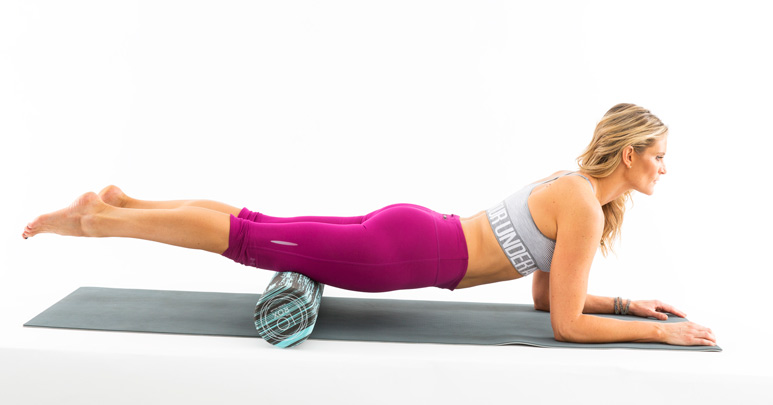
Front of the Thigh Roll
1 Lie down with your belly facing the mat, elbows placed directly under your shoulders, palms facedown. Keeping your legs straight, place the roller just above the front of your knees.
2 Engage your core to prop yourself up and protect your low back. Ground down through your forearms and bend your knees to lengthen the thigh muscles, thus breaking down the thickness and density around the thighs and increasing circulation.
3 Using your arms and core, exhale as you roll the roller up the front of your thighs to your hipbones.
4 Inhale as you press the roller down to just above the front of your knees.
5 Repeat eight to 10 times.
Lauren Roxburgh is wearing clothing by Under Armour: underarmour.com
LoRox Aligned Roller: laurenroxburgh.com
Yoga mat by Yoga Rat: yogarat.com

